Genesis makes it easy for anyone to setup a WordPress website – no developer required!
I specialize in crafting custom WordPress themes for businesses, but not everyone has the budget or time available for our full design process.
This article will walk you through setting up a WordPress website yourself. My recommendations below will help you create a fast, elegant, and SEO friendly website.
Quick Links
- Domain and Hosting
- Pick a theme
- Install the theme
- One-click demo install
- WordPress training
- Recommended plugins
Why Genesis?
There are plenty of WordPress themes on the market, but most are bloated with features you don’t need that slow down your site and make it difficult to edit. Once you purchase the theme, it’s often challenging to set it up to match the demo.
Genesis is different. It’s built for speed and SEO. And now with its one-click demo install, it’s simple to setup.
Genesis includes many design and layout options packaged as child themes. There are dozens of Genesis child themes available, so pick the one that best fits your needs.
The core Genesis theme framework holds all the essential features and tools used on every website and is packaged as the parent theme.
Where to find Genesis themes?
You can purchase Genesis themes and the core framework from StudioPress. If you use WPEngine as your web host, you have access to all the themes for free.
Here’s how you setup a WordPress website using a Genesis theme.
Step 1: Domain and Hosting
If you already have a website up and running, you can move on to the next step.
A domain is the URL people type in their browser to find you. It’s your address on the web. You can purchase them for about $10/year at Namecheap or Godaddy.
A web host is the server that holds your website. Since you plan to have a WordPress website, I highly recommend getting a WordPress managed host, which is a host that specializes in WordPress websites. Here are my recommended hosts.
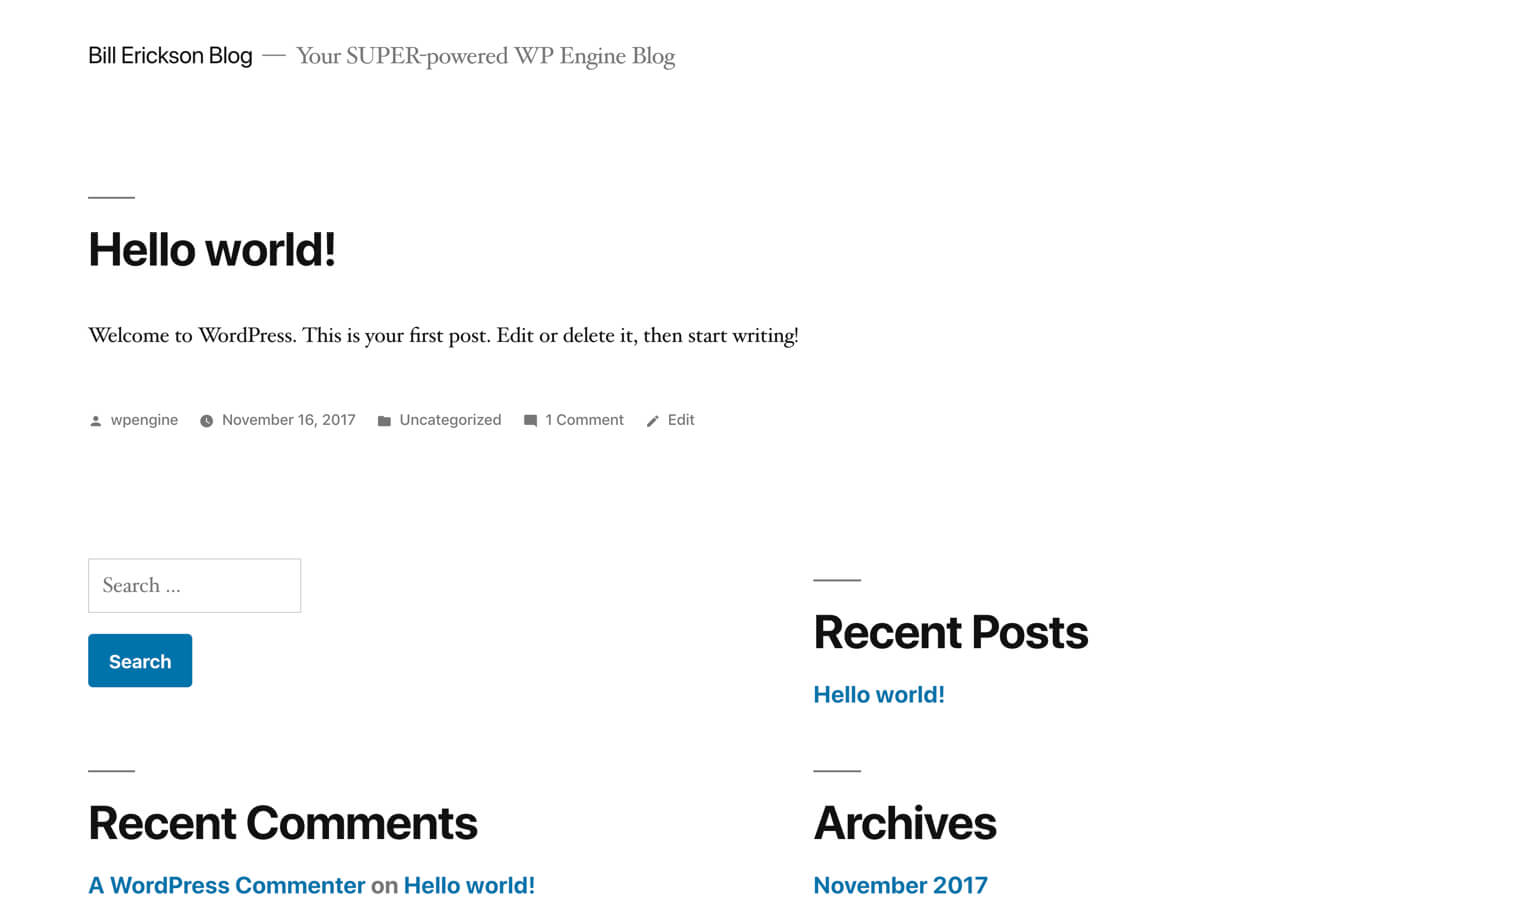
Once you have purchased a domain, signed up for hosting, and pointed your domain at your new host (your host will provide instructions on how to do this), you should have a brand new WordPress website that looks something like this:

Step 2: Select a theme
Browse the dozens of Genesis themes to find one that will work well for your specific needs. I recommend picking one of the newer themes because they take advantage of all the new features in WordPress, and are more likely to have the one-click demo install available.

For this tutorial I’m going to use the Revolution Pro theme, the most recently released Genesis theme when this article was published.
Step 3: Install your theme
After selecting a theme and either purchasing it from StudioPress or downloading it from your WPEngine account, you should have two zip files: one for the Genesis theme framework, and one for your child theme.
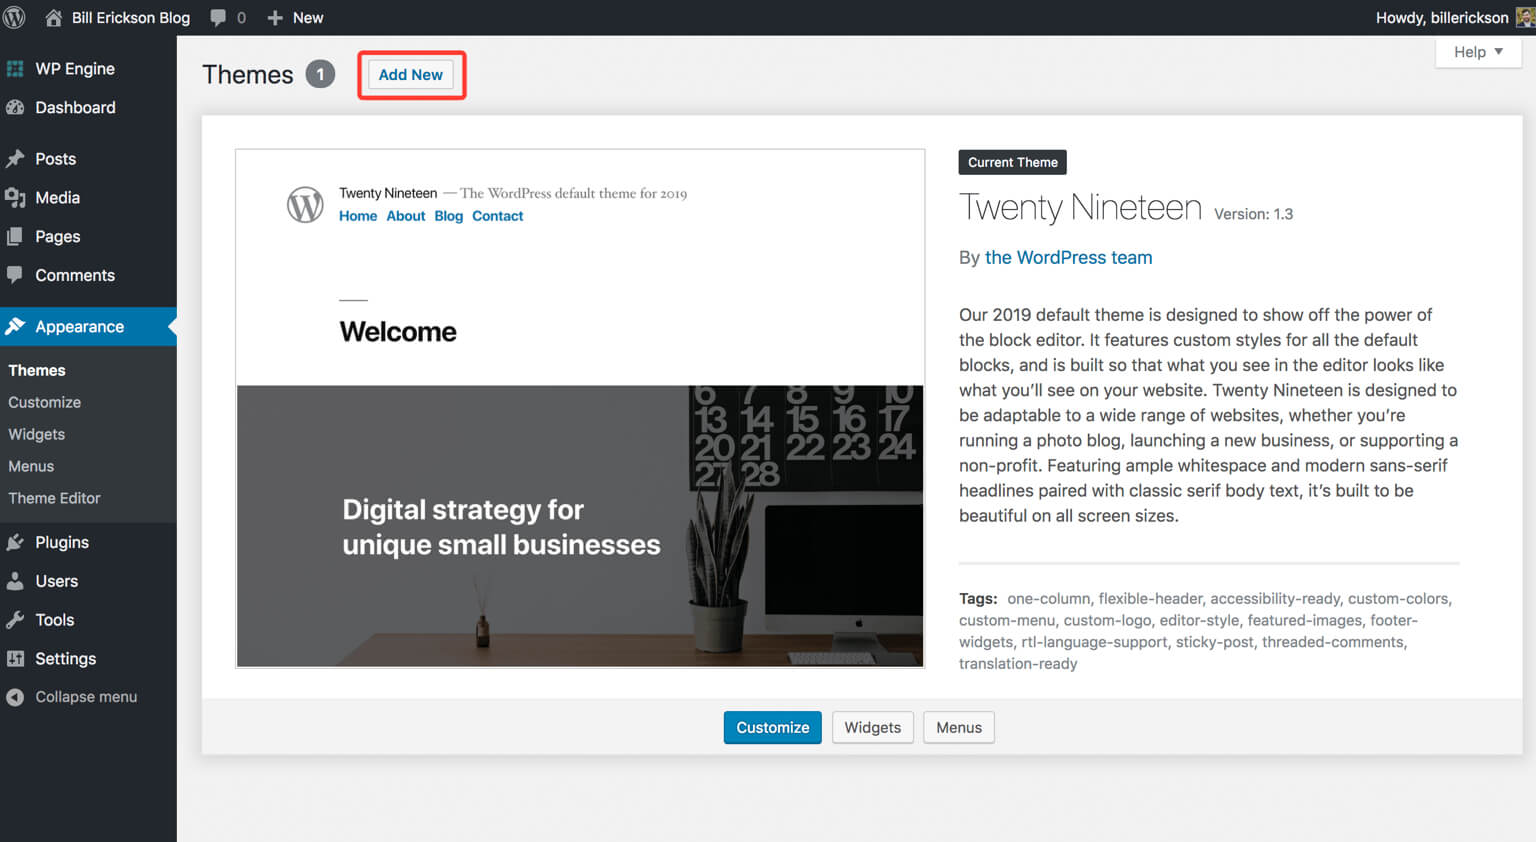
In your WordPress website, go to Appearance > Themes and click the “Add New” button at the top:

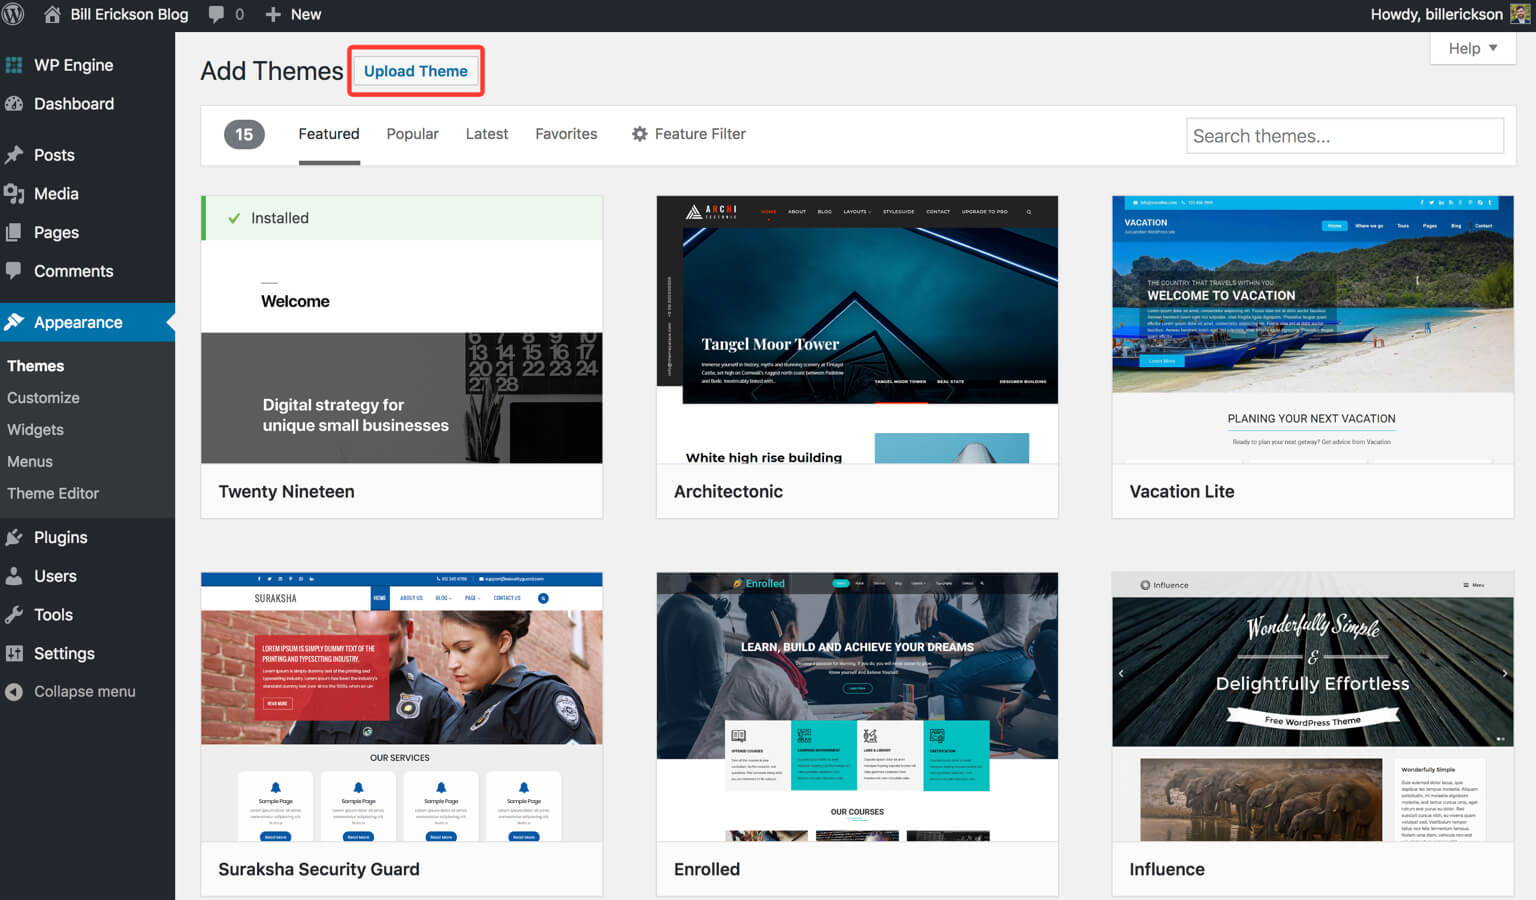
Then click the “Upload” button and upload the Genesis zip file. Do the same with your child theme zip file. After uploading your child theme, click “Activate”.

Step 4: One-click demo install
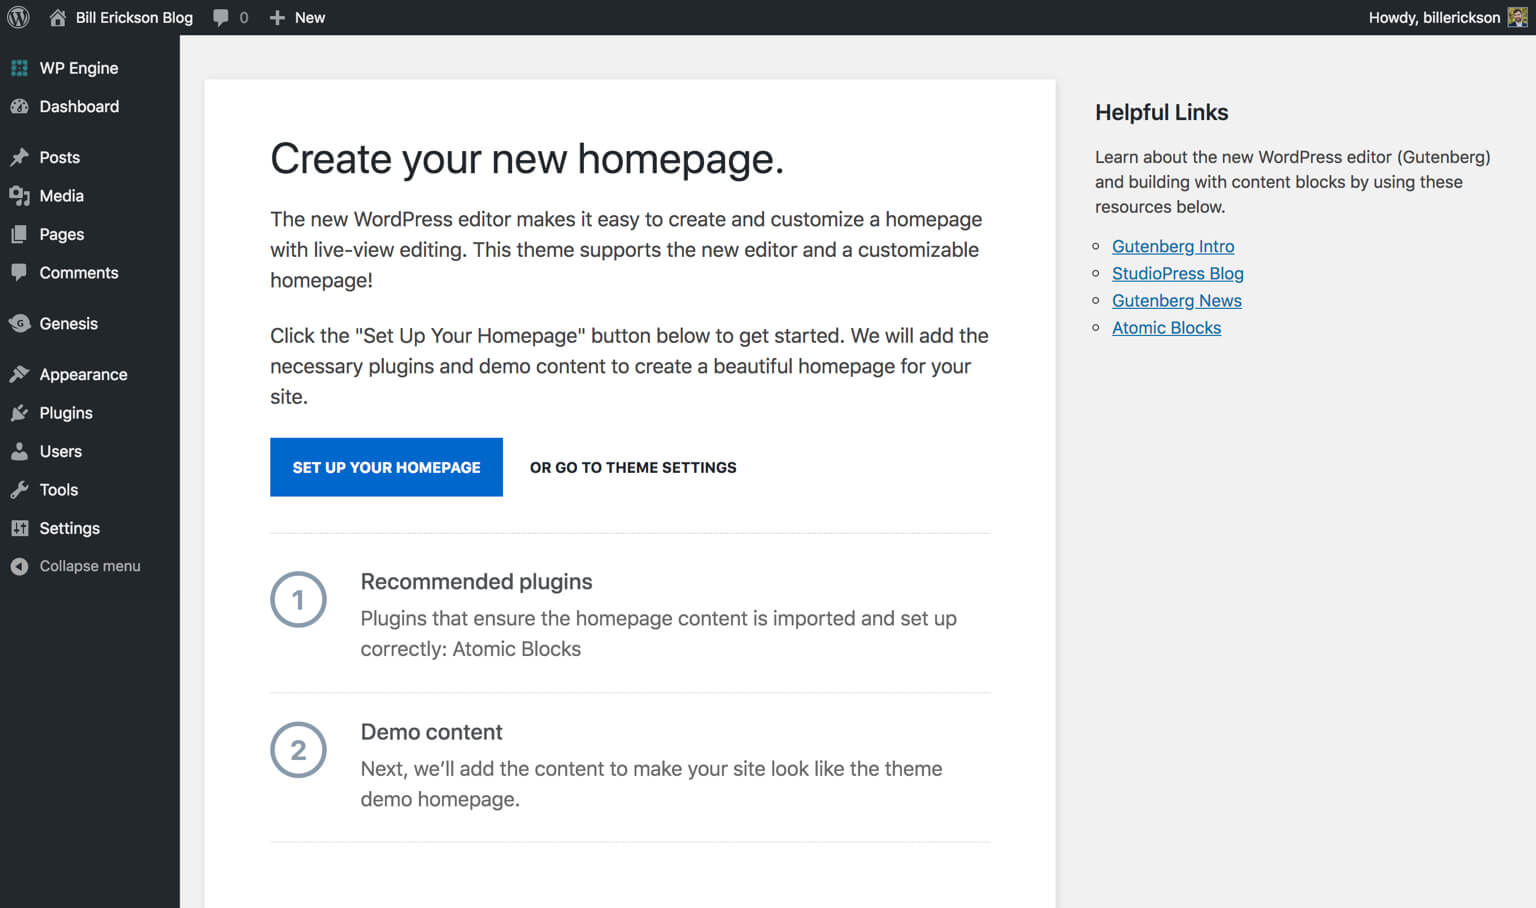
If you selected one of the newer themes, you should now see the screen below. This is the one-click demo install. It will automatically install any plugins used on the demo site, and update the content to match the demo.

That’s it! You should now have a website that matches the demo site. Visit your homepage, click “Edit Page” in the toolbar at the top, and start customizing your site’s content.
WordPress Training
If you need help learning the WordPress content editor or backend, I recommend you sign up for WP101. They provide incredible video tutorials for WordPress and popular plugins.
Here’s one of their videos describing the Gutenberg content editor.
Recommended Plugins
These are plugins I use on almost every website.
- Yoast SEO to help with search engine optimization. You may also consider Yoast SEO Premium.
- WPForms Lite for contact forms. Also look at the premium version of WPForms for more advanced form fields, online payments, and newsletter integrations.
- MonsterInsights for Google Analytics integration. Check out their premium version for additional reports and features. Here’s more information on Using Google Analytics.
- WP Rocket for speeding up your website (more information).
Em says
Hi, if you aren’t hosted by wpengine, should the website still look like the demo after you install them? I’m having some issues with mine.
Bill Erickson says
If the theme you purchased includes the “One click demo install”, then yes, it should match the demo. I know the Revolution Pro theme includes it, which is what I used for this article’s demonstration.
If the theme does not include the one-click demo install, it should include instructions on how to match the demo.
You can contact StudioPress support if you’re having trouble.