My favorite new feature in Advanced Custom Fields 5.9 is support for InnerBlocks. This allows you to insert any block (core or custom) inside your ACF block.
Rather than having to create your own fields for Title, Content, and Button in your custom block, you can simply insert <InnerBlocks /> and use the block editor to build the content inside the block.
Table of Contents
How to use InnerBlocks
When registering your ACF block, include 'jsx' => true in the supports array.
acf_register_block_type( array(
	'title'			=> __( 'About', 'client_textdomain' ),
	'name'			=> 'about',
	'render_template'	=> 'partials/blocks/about.php',
	'mode'			=> 'preview',
	'supports'		=> [
		'align'			=> false,
		'anchor'		=> true,
		'customClassName'	=> true,
		'jsx' 			=> true,
	]
));
In your template partial for the block, include <InnerBlocks /> where you would like the editable block area to appear.
$classes = ['block-about'];
if( !empty( $block['className'] ) )
    $classes = array_merge( $classes, explode( ' ', $block['className'] ) );

$anchor = '';
if( !empty( $block['anchor'] ) )
	$anchor = ' id="' . sanitize_title( $block['anchor'] ) . '"';

echo '<div class="' . join( ' ', $classes ) . '"' . $anchor . '>';
	echo '<div class="block-about__inner">';
		echo '<div class="block-about__content">';
			echo '<InnerBlocks />';
		echo '</div>';
		echo '<div class="block-about__image">';
			echo wp_get_attachment_image( get_field( 'image' ), 'be_thumbnail_l' );
		echo '</div>';
	echo '</div>';
echo '</div>';
Default value for InnerBlocks
It’s helpful to fill the InnerBlocks field with default content so the block looks correct when first inserted.
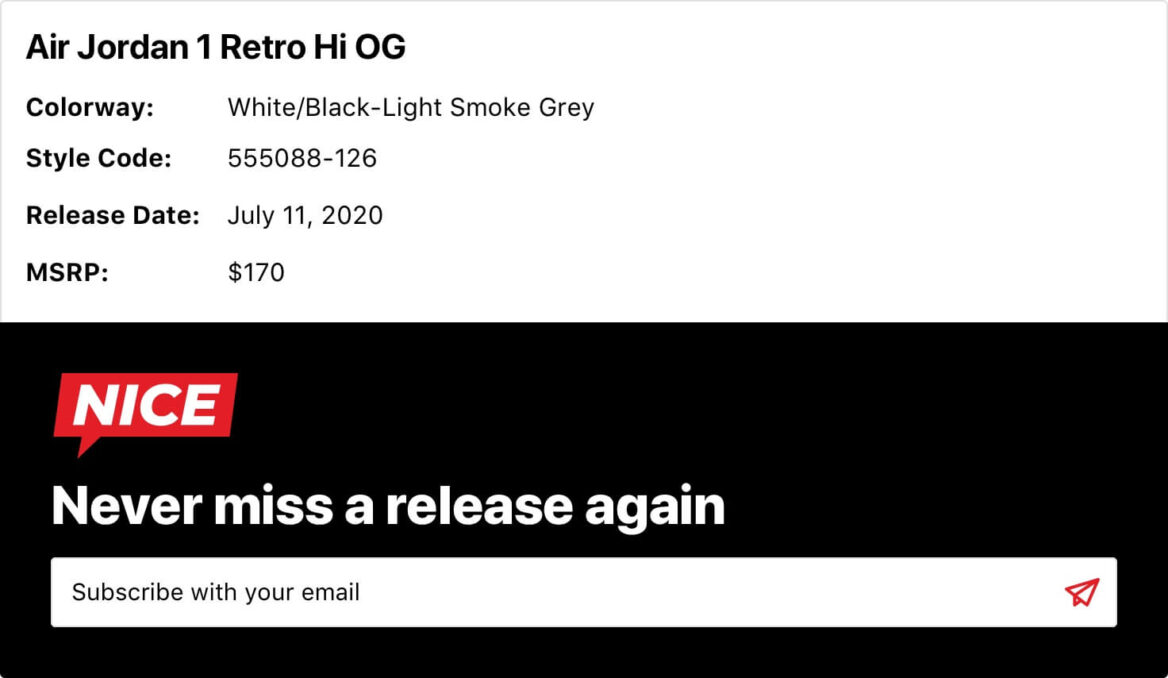
We’re building a new site for Nice Kicks, and they often need to highlight the release date and details for new sneakers. We built a Release Info block that uses InnerBlocks for the content area.

Rather than just having an empty white box when they first insert the block, we pre-populate it with default content using a block template.
Inside the block’s template file, create a $template array detailing which blocks should be added. Update <InnerBlocks /> to include the template.
You can find the available block attributes in a blocks.json file for each block in wp-includes/blocks.
$template = array(
	array('core/heading', array(
		'level' => 2,
		'content' => 'Title Goes Here',
	)),
    array( 'core/paragraph', array(
        'content' => '<strong>Colorway:</strong> <br /><strong>Style Code:</strong>  <br /><strong>Release Date:</strong> <br /><strong>MSRP:</strong> ',
    ) )
);

echo '<div class="' . join( ' ', $classes ) . '"' . $anchor . '>';
	echo '<InnerBlocks template="' . esc_attr( wp_json_encode( $template ) ) . '" />';
	$form_id = get_option( 'options_be_release_info_form' );
	if( !empty( $form_id ) && function_exists( 'wpforms_display' ) )
		wpforms_display( $form_id, true, true );
echo '</div>';

Placeholders instead of default content
In the above example we set the starting content for the block. If you were to publish the post without changing the text, the default content would appear in the blocks.
Alternatively, you can use the placeholder parameter to specify placeholder text. This will not be published, and when you select the field the placeholder text disappears.
I had two issues with placeholders, which is why I used default content instead:
- When you insert the block, the first block inside InnerBlocks is selected so its placeholder text is not visible. You have to insert the block then click outside the block to see the placeholder text.
- The placeholder field does not support HTML. In my use case, we used
<strong>and<br />to format the paragraph text, but that doesn’t work with the placeholder.
To use placeholders with the above example, change the $template to
$template = array(
	array('core/heading', array(
		'level' => 2,
		'placeholder' => 'Title Goes Here',
	)),
	array( 'core/paragraph', array(
		'placeholder' => '<strong>Colorway:</strong> <br /><strong>Style #:</strong>  <br /><strong>Release Date:</strong> <br /><strong>Price:</strong> ',
	) )
);
And this was the result:

Limit the blocks available in InnerBlocks
You can limit which blocks can be inserted into your InnerBlocks field using the allowedBlocks attribute.
Using the example above, I can limit the Release Info block to only include the heading and paragraph blocks:
$allowed_blocks = array( 'core/heading', 'core/paragraph' );

$template = array(
	array('core/heading', array(
		'level' => 2,
		'content' => 'Title Goes Here',
	)),
    array( 'core/paragraph', array(
        'content' => '<strong>Colorway:</strong> <br /><strong>Style Code:</strong>  <br /><strong>Release Date:</strong> <br /><strong>MSRP:</strong> ',
    ) )
);

echo '<div class="' . join( ' ', $classes ) . '"' . $anchor . '>';
	echo '<InnerBlocks allowedBlocks="' . esc_attr( wp_json_encode( $allowed_blocks ) ) . '" template="' . esc_attr( wp_json_encode( $template ) ) . '" />';
	$form_id = get_option( 'options_be_release_info_form' );
	if( !empty( $form_id ) && function_exists( 'wpforms_display' ) )
		wpforms_display( $form_id, true, true );
echo '</div>';
Template lock with InnerBlocks
You can also limit the flexibility by locking the template.
Adding templateLock="all" prevents inserting new blocks or removing/re-arranging current blocks
Adding templateLock="insert" prevents inserting new blocks or removing current blocks, but you can re-arrange the current blocks.
I recently built an Icon Heading block. The icon can be selected in the block settings sidebar using a dynamic dropdown field.

I used InnerBlocks for the heading itself so it would have all the standard options for customizing the heading (change block style, change heading type to h3). I used templateLock="all" so only the heading from my block template could be used in this block.
$classes = ['block-icon-heading'];
if( !empty( $block['className'] ) )
    $classes = array_merge( $classes, explode( ' ', $block['className'] ) );
if( !empty( $block['align'] ) )
    $classes[] = 'align' . $block['align'];

$anchor = '';
if( !empty( $block['anchor'] ) )
	$anchor = ' id="' . sanitize_title( $block['anchor'] ) . '"';

$template = array(
	array('core/heading', array(
		'level' => 2,
		'content' => 'Heading',
	)),
);

echo '<div class="' . join( ' ', $classes ) . '"' . $anchor . '>';
	$icon = get_field( 'dynamic_icon_category' );
	if( !empty( $icon ) )
		echo '<div class="icon-heading-wrap">' . be_icon( [ 'icon' => $icon, 'group' => 'category', 'size' => 38 ] ) . '</div>';
	echo '<InnerBlocks template="' . esc_attr( wp_json_encode( $template ) ) . '" templateLock="all" />';
echo '</div>';
Andrew says
Bill, I love your content/website, I would opening support affiliate links from you or other ways to support.
A question I have, I am working with Innerblocks to make a columns block, I thought it would be excellent content to show the making of a columns custom block and a column acf block.
Bill Erickson says
The issue you’ll have with creating a Columns block is that you can only have a single InnerBlocks in your custom block. So the way I would approach it is:
Robert Turner says
Could you show us an example of how to do Blocks with ACF repeater groups and relationships?
Neil says
Second this! Bill, I appreciate how your blog posts don’t just provide an example, but actually explain the logic behind the pieces of each example, so that others can understand the logic and create their own solution. So many “help” pieces only provide what is essentially a template to repeat the exact same thing and many are difficult to learn from.
Refreshing.
Bill Erickson says
The repeater field in an ACF block works exactly the same as it would with an ACF metabox. Here’s an example:
On the new CultivateWP site we have a “Partners” block that has a repeater. Here’s how it looks like rendered (screenshot) and here’s what it looks like when you select the block (screenshot). Here’s the code.
I find that it’s best to set the mode to “auto” so you can use the repeater in the main content area. If you set it to “preview” you’d have to manage your repeater in the sidebar, and it’s a bit too cramped over there.
Inside the block, I’m calling
get_field( 'partners' )and then looping over the repeater field data.You could also use InnerBlocks inside this block too (I didn’t have any need for that). Somewhere in the block markup you’d put
<InnerBlocks />and in the block registration you’d set'jsx' => true.Julian says
Thanks so much. Your articles are some of the most helpful I’ve read about using Gutenberg. However, I still have problems successfully combining ACF and core blocks.
For example, I might want to create a “card” block that contains a background image, an H3 heading, and a paragraph. I can, as you describe, put in a core/heading block as an inner block, set its initial state to H3, and even put in some placeholder text. So far, so good. But I can not see a way to fix that heading at H3 to stop people changing it to another heading level – thus messing up the card design.
I could revert to using an ACF text field for the heading, which would solve that problem, but they would no longer be able to edit the text in “preview” mode. So depending on whether each text element was in a core block or an ACF field, they would have to keep jumping between “edit” and “preview”, giving them a disjointed experience of using the CMS.
So I’m wondering if there is something a bit like template lock, but that instead of stopping people from inserting and rearranging blocks, it stops them from doing anything but editing the text.
I don’t want to treat you as a support forum! But I think this might be an issue that many people encounter. If so, it could be helpful to mention it here.
Bill Erickson says
You’re right, while you can use the template lock to prevent adding/removing/reordering the blocks used in that area, you can’t limit the options attached to those blocks. There isn’t an “h3” block, there’s a Heading block with the heading type as an option.
You could build the card as you have described (h3, paragraph, background image option) but style it so an h2, h3, h4, h5, or h6 all looks the same. This would prevent the visual design of the block from breaking if someone used a different heading.
Another approach is to make the “heading” a paragraph with a custom class that styles it to look like an h3. This is what I do in blocks where the large text looks like a heading but semantically should not be a heading. In a CTA block, I might have a paragraph with a class of
.block-cta__title.Alekanto says
Thanks a lot for your article. I think it’s the greatest showcase with explanation of ACF use cases I’ve seen so far.
And with the additionnal example of template lock usage within a acf block, it can be super useful/powerful.
Cheers from Italy.
Alek says
Sorry :
*explanation of ACF innerblock
Casey Milne says
Hey Bill, I’m trying to figure out how to specify a custom appender in an ACF block. Do you know if that’s possible? In React you have to get the component like InnerBlocks.ButtonBlockAppender and pass it to the renderAppender. I’ve tried passing various names into a JSON array but nothing I pass to renderAppender does anything, some things break the block others just leave me with the default appender. I think it’s so important to have a wider appender than the default.
Bill Erickson says
I’m sorry but I don’t know what a “custom appender” is. You might try reaching out to ACF support.
The new version of ACF supports building custom blocks “the WordPress way”, using `register_block_type()` and a block.json file. So if you have a WP tutorial on how to add an appender, it might work best with the new block.json approach in ACF.